Migration from ACE 4 to ACE 5
See introduction to ACE 5 for overview of new features in ACE 5.
Main differences
Workflow
Main difference between ACE 4 and ACE 5 is designer and development workflow. In ACE 4 all users work in the same workspace and changes made in Flow Manager are immediately visible to all users in same environment.
ACE 5 switches to feature branch model and is tightly integrated with Git. Each user should work on his feature in a
separate workspace (branch), and every save in ACE Designer is a Git push under the hood. When feature is completed user
creates pull request in DevOps platform (i.e. Azure DevOps). Pull request is then reviewed and merged to master or
other branch according to project needs.
Deployment
In ACE 4 changes are saved directly in target environment (i.e. DEV) on persistent data volume and therefore are immediately available in the particular environment. However, to move the changes to other environments it is necessary to export workspace and import it in upper environment, preferably via script/pipeline.
In ACE 5 changes are saved in Git, so it's required to have a deployment to move changes from Git to the target environment. It is necessary to create a pipeline, which takes changes from Git and copies them to a Docker image as described in deployment overview. Docker image then can be installed on any target environment without further export/import.
Runtime
Runtime wise ACE 4 and 5 shares same code, so ACE 5 has same runtime features as ACE 4, but in ACE 5 we have moved away from many internal microservices to one runtime service which allows to reduce a number of internal network calls and improves ACE performance.
Prerequisites
- Dedicated Git repository for ACE 5
- Private Docker repository for custom Docker images
Environment migration
ACE 5 doesn't use any of ACE 4 services, so migration can be done side by side in the same environment
- Install ACE 5 according to deployment guide
- Migrate workspace as described below
- Test migrated workspace
- Delete ACE 4 services
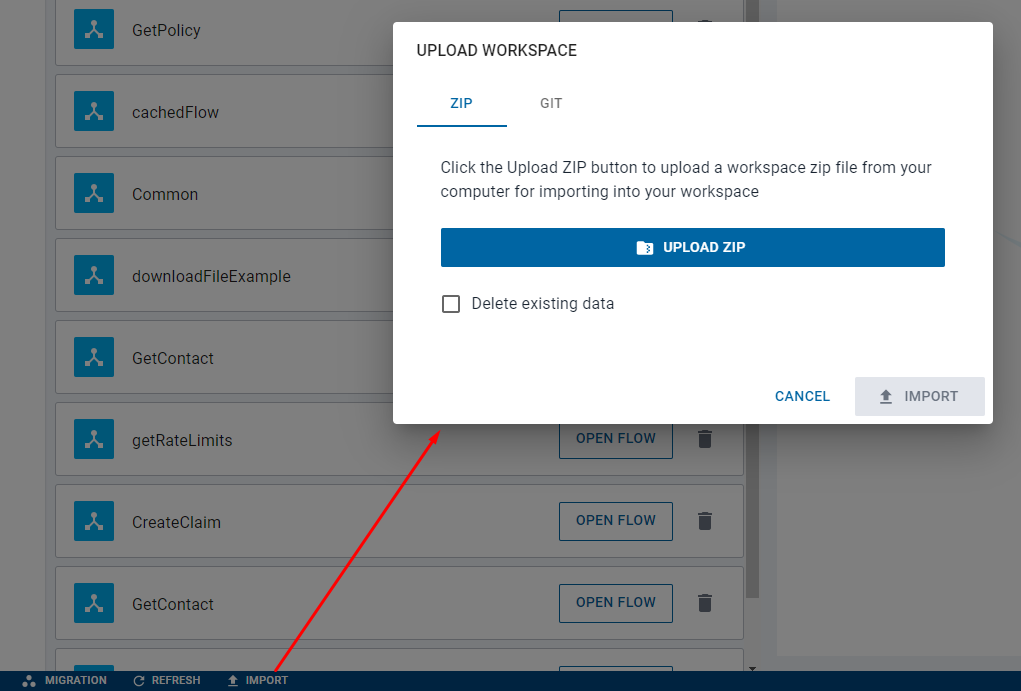
Workspace migration
Workspace migration should be done via ACE Designer UI.
- Create a dedicated migration workspace (branch)
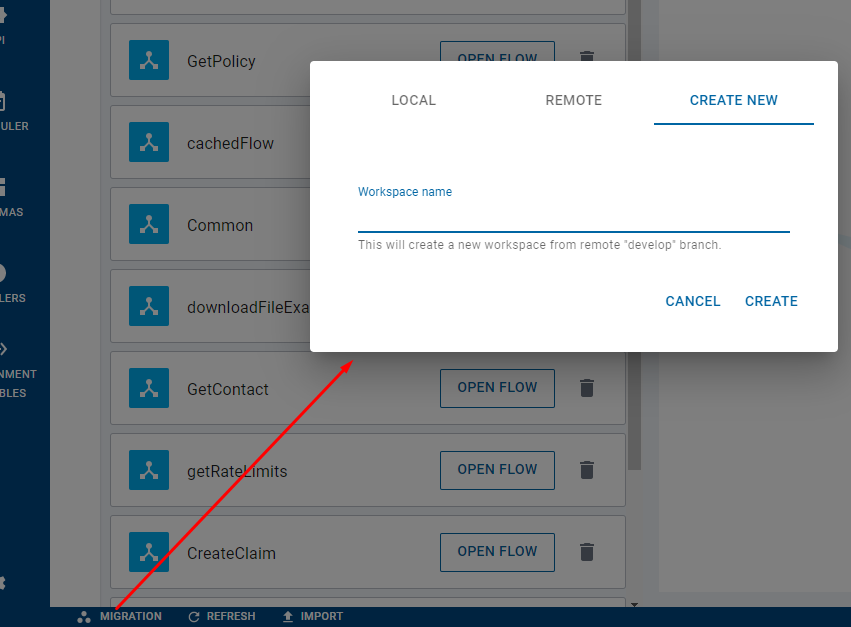
- Use Import UI to import ACE 4 workspace either from .zip file or ACE 4 Git repository.
- Review changes
- Review changes in ACE 5 Designer
- Create a pull request in DevOps tool (i.e. Azure DevOps)
- Review changes in DevOps tool
- Merge changes to
developbranch - Deploy
developbranch to lower (i.e. DEV) environment