Keycloak Setup
This is a bare-minimum setup to get ACE working with Keycloak authentication. For additional Keycloak configuration, refer to the official keycloak documentation here.
Prerequisites
This guide assumes Keycloak (version 20.0 or higher) and ACE services (version 24.1.0) are up and running, and that ACE has access to Keycloak.
Summary
Here's a brief summary on the required configuration.
Configuring Keycloak:
- Create a dedicated realm in Keycloak for ACE, e.g. "ACE"
- Create a client in the "ACE" realm, e.g. "ace-client"
- Configure "ace-client" client to enable "Client authentication" with "Standard flow" and "Direct access grant"
- Configure "ace-client" client to have a "Valid redirect URI", "Valid post logout redirect URIs" and "Web origins" pointing to the public URL of your ACE Designer.
- Create a client scope "openid" and "ace-api". The scope "ace-api" must be configured with an "Audience" type mapper, which has to specify the ACE audience value, e.g. "ace-client".
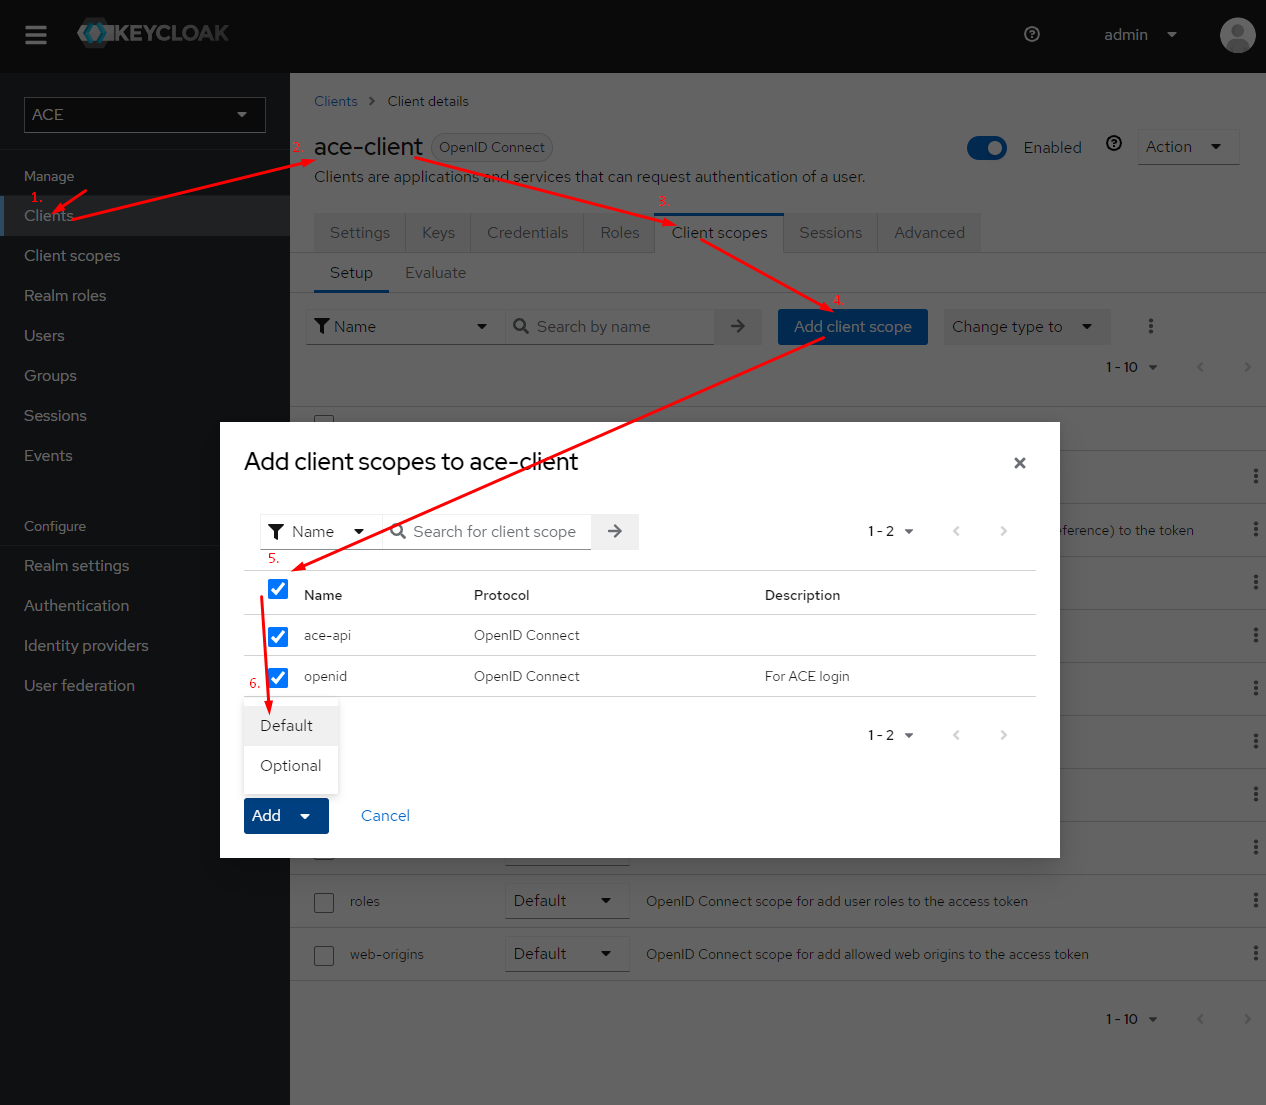
- Go to the "ace-client" client scope section and attach the new "openid" and "ace-api" scope to the client.
Configuring ACE:
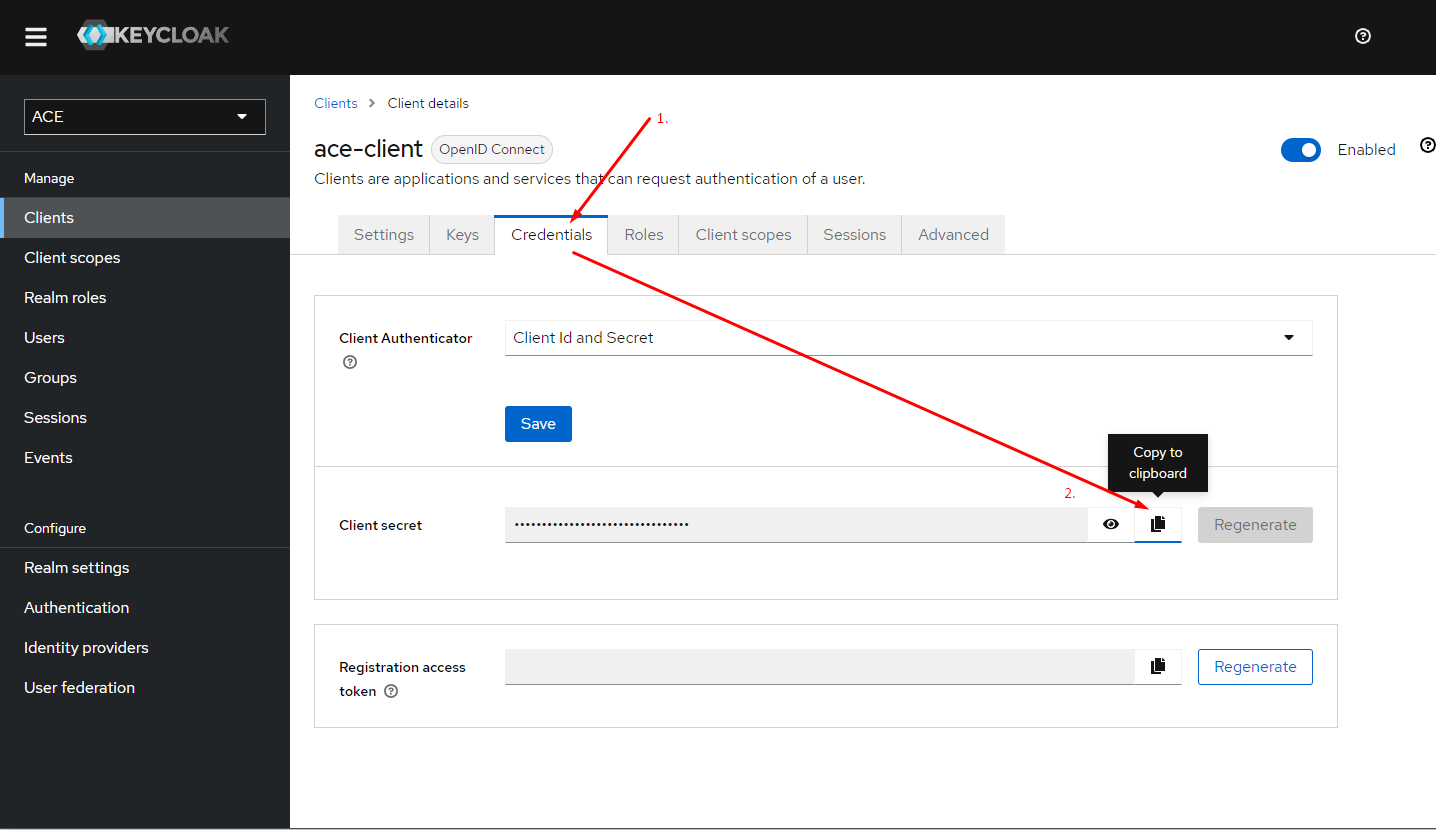
- Specify the Keycloak URL, "ace-client" client secret and "ace-api" scope audience in ACE service security environment variables.
How to setup
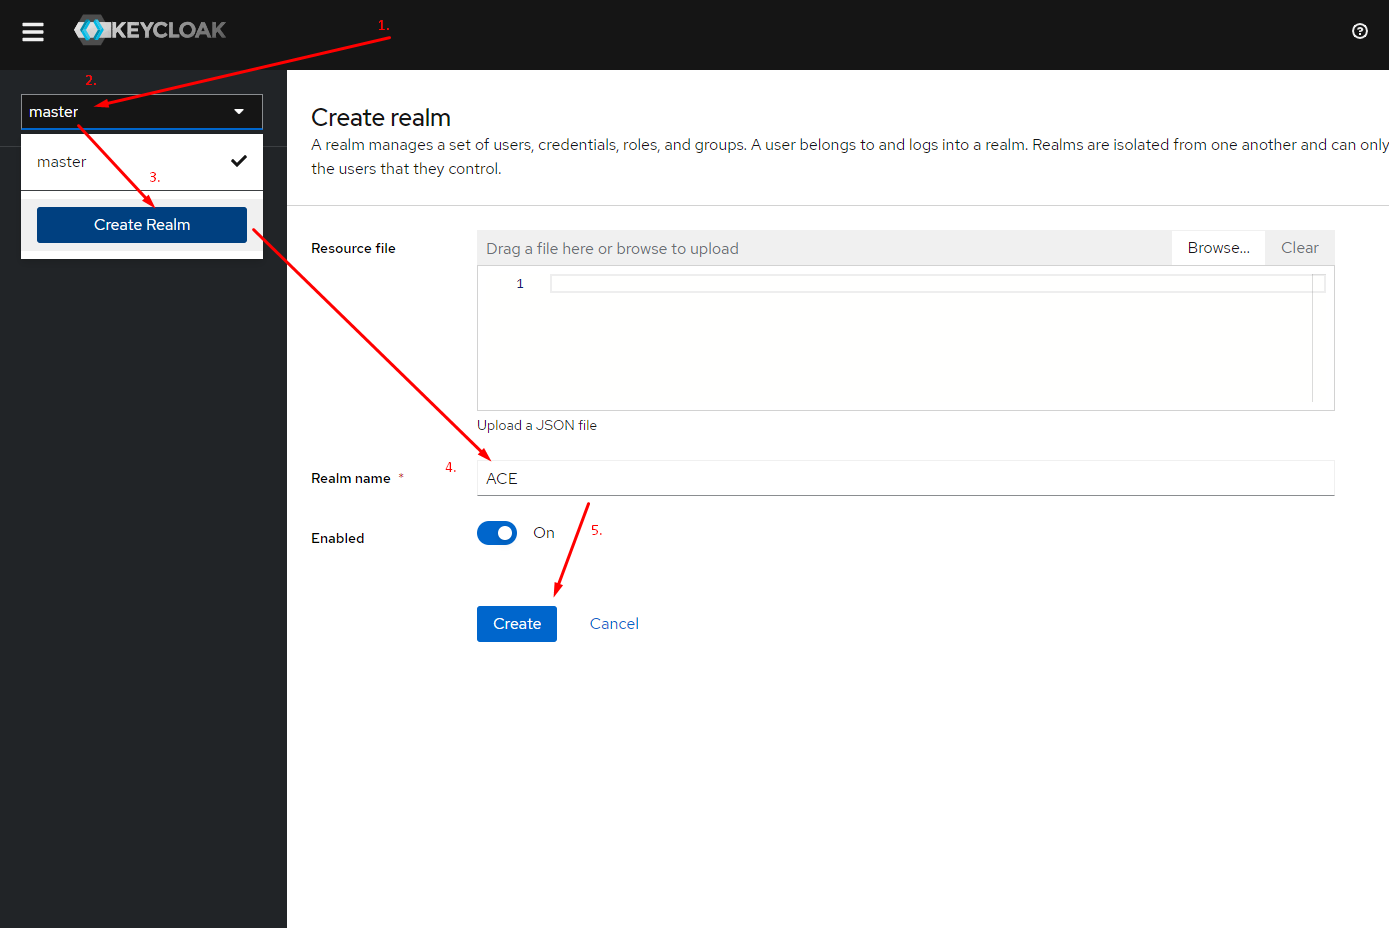
Setup the realm
The first step is to create a realm and give it a name, e.g. "ACE". From now on, we will be making changes in the "ACE" realm, so make sure it is selected after creating it.
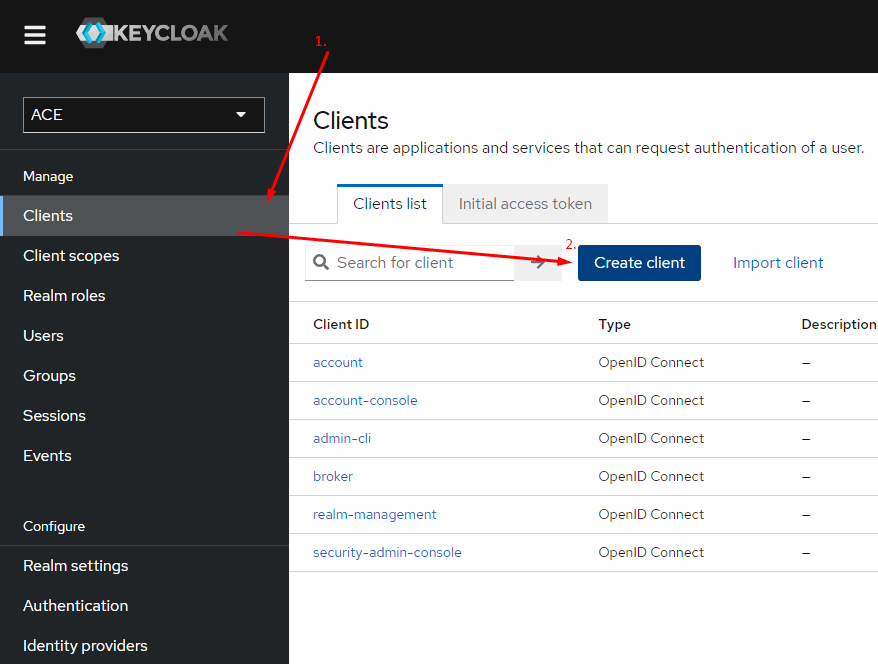
Create the client
It is necessary to create a client which will be used by the ACE users.
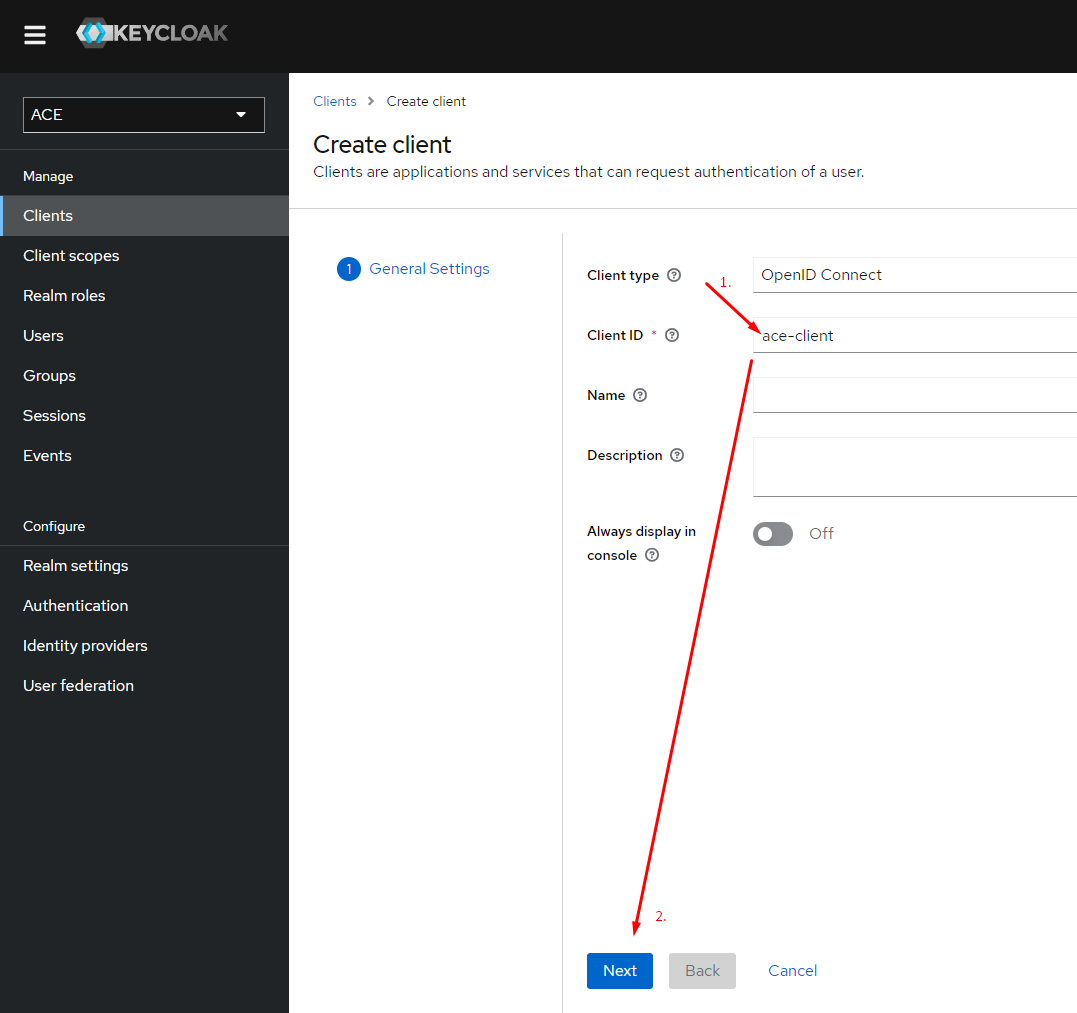
Make sure that "Client authentication" and authentication flow is configured.

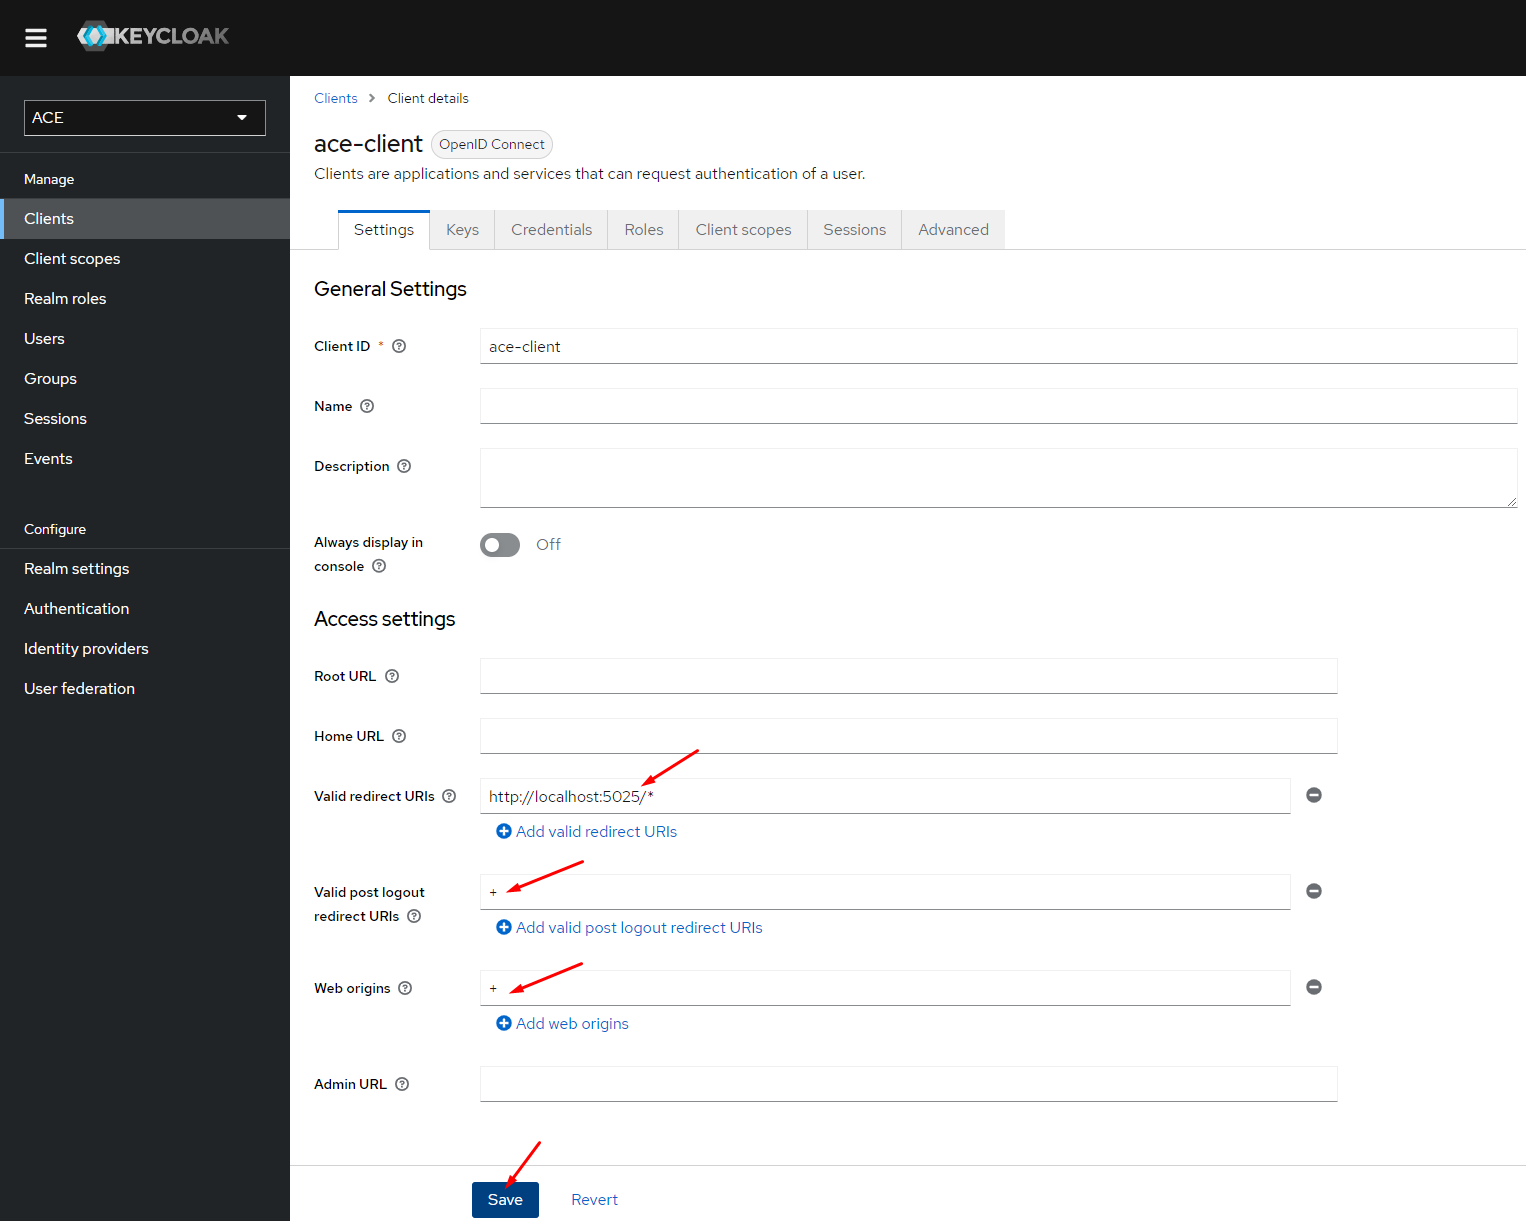
Configure redirects
The following image uses http://localhost:5025, replace it with the public URL of your ACE Designer.
The "+" here will re-use the "Valid redirect URIs" field for the other fields.
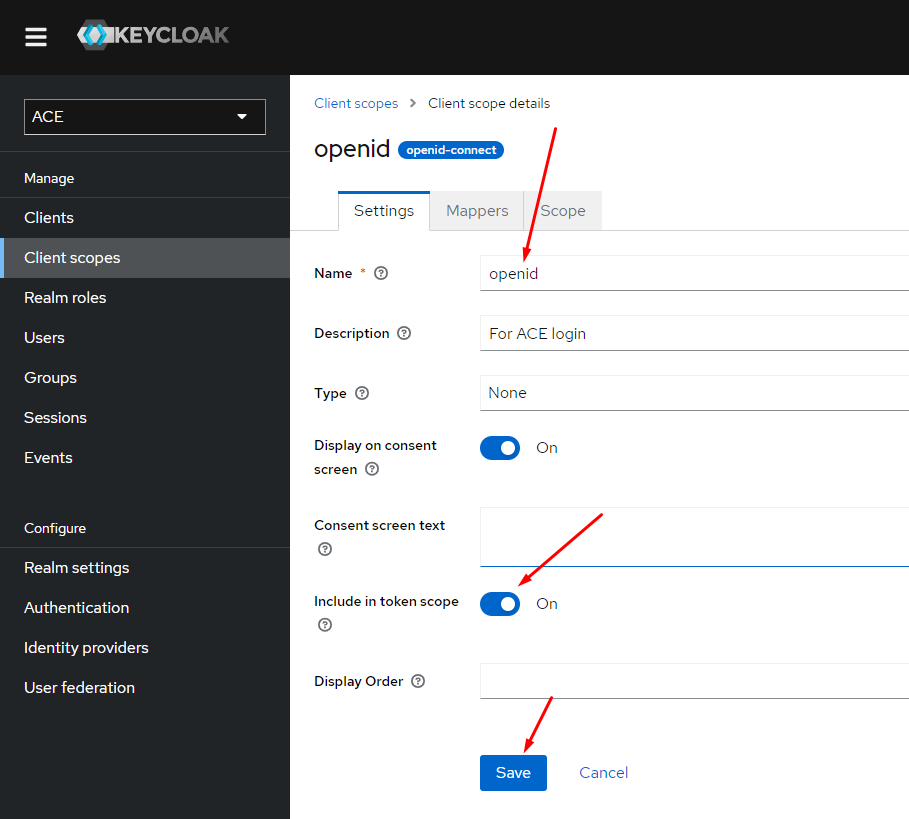
Create the "openid" scope.

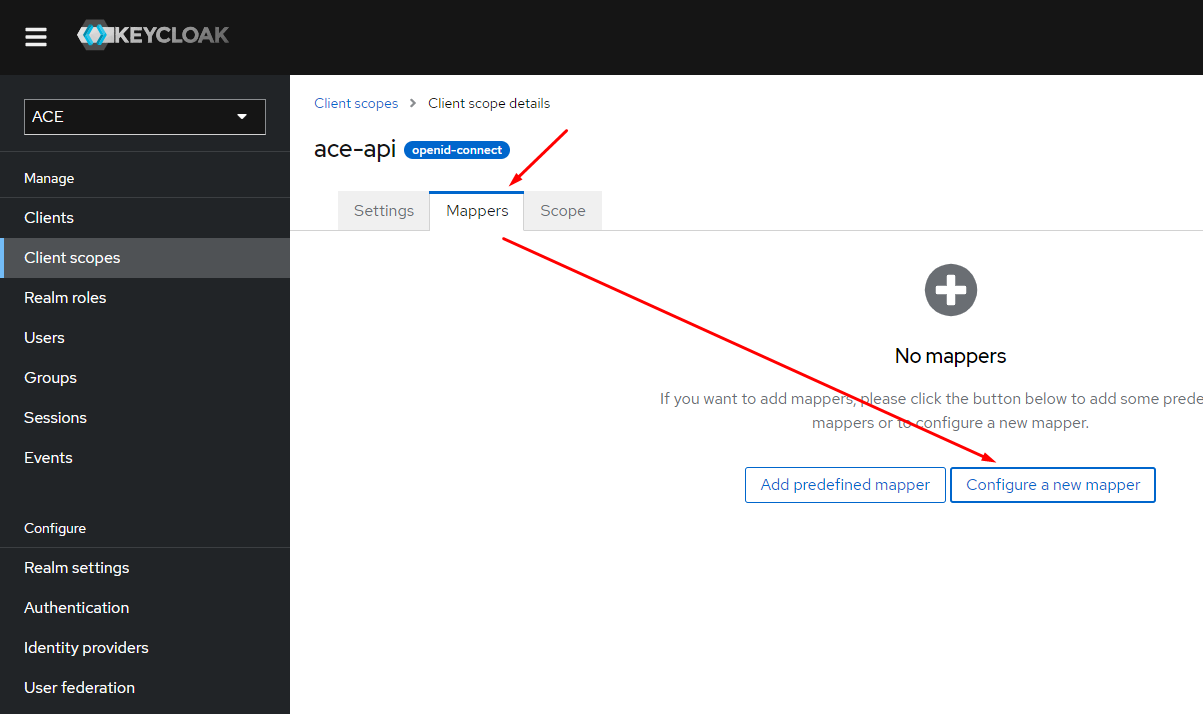
Create the "ace-api" scope
Create another scope "ace-api". The "ace-api" scope will also need to configure a mapper for "aud" (audience) claim "ace-client".

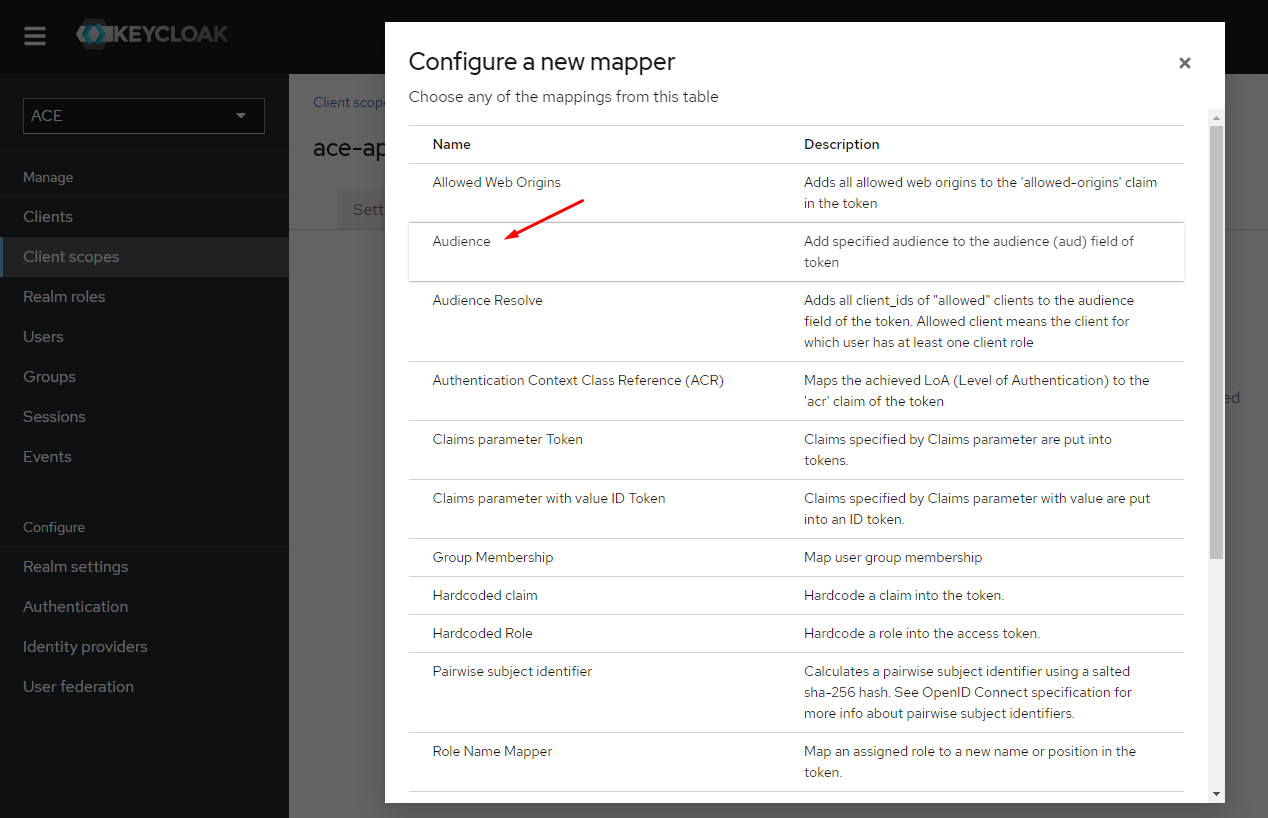
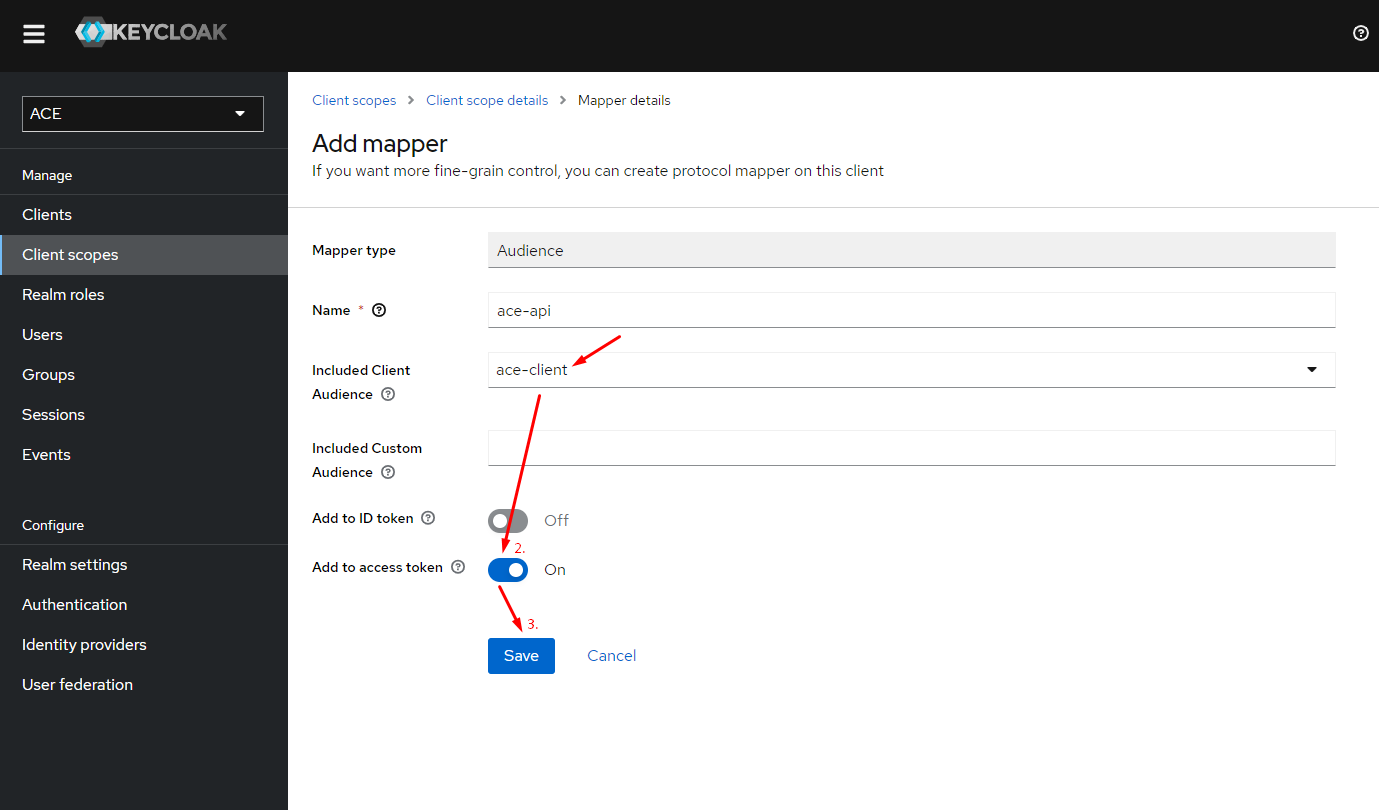
Configure the audience mapper
Attach scopes to client
Obtain the client secret
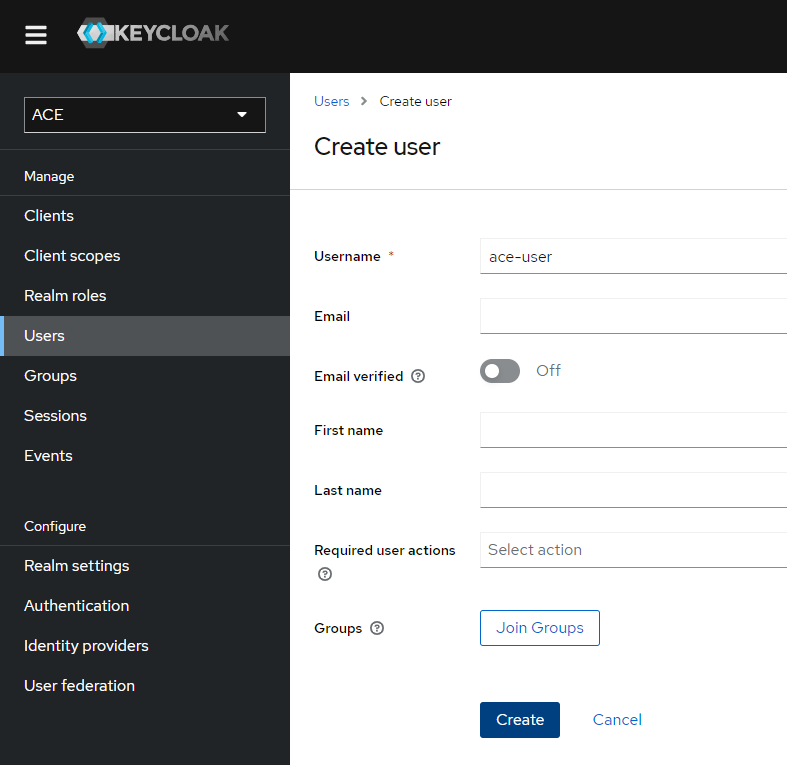
Create a realm user
Remember to create a user to login with. Make sure the user is created in the correct realm "ACE".
Configure ACE environment variables
Now that the value for "aud" (audience) and client secret is known, update the ACE service security environment variables. with the necessary fields.
After successfully restarting ACE services with the new env variables, it should be possible to open ACE Designer and log in using Keycloak by providing details for the created user. If there are any issues with login, refer to the debugging section.
Debugging
Validate the token claims
Create a token manually following this guide and decode it. Your token should be an access token containing the following scopes:
- "iss" which matches "issuer" in
<KEYCLOAK_AUTH_SERVER_URL>/.well-known/openid-configuration - "aud" which contains the audience name "ace-client". This should also match what's configured in ACE env variable
ACE_OIDC_AUDIENCE. - "scope" which contains "openid"
- "allowed-origins" which matches the public ACE Designer URL
Validate the well-known endpoint
The URL <KEYCLOAK_AUTH_SERVER_URL>/.well-known/openid-configuration must resolve correctly to the well known configuration - a JSON object containing the "iss" (issuer) value and other details.
To verify whether it is the correct /.well-known/openid-configuration URL, navigate to it and find the "jwks_uri" field which should contain the jwks URL. Navigate to the "jwks_uri" URL and verify that the document returned by this URL contains the same "kid" as the token obtained from manually generating a keycloak token.. The "kid" of the token can be found in the token header.
Other issues
For any other issues, inspect the logs in ace-designer service for possible hints.